For years I have wanted a water feature in my gardens. I wanted the children to be able to play in a stream and splash in a brook. I loved waterlilies and the ecosystem of a pond. I loved the look and sound of a waterfall. Unfortunately we were not blessed with a natural water feature on our property, and it didn’t seem we could make one. About ten years ago I bought a little patio pond kit, with a large black cauldron, a waterlily, and a vertical plant of some kind. I was thrilled! I bought a couple goldfish and looked forward to a summer with a nice little watergarden. Unfortunately, by mid-summer the snails were eating my lilypads and my fish went belly-up (I later figured out the poor things cooked! black pool, hot sun, no water circulation… poor things!) So I gave up. I poked holes in the cauldron and turned it into a planter.
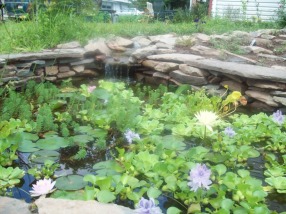
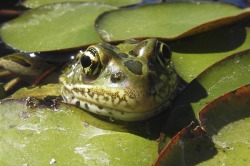
Then a few years ago we built an addition and we had a great big pile of clay to do something with! The time was right! I did lots of research over the winter and by summer I knew what needed to be done. My husband used the clay to increase the grade of our slightly sloping yard, and he and my son dug a hole. I laid the stone around the pond, and the girls and I arranged the stream and waterfall. That took us to autumn, but by spring of last year we were ready to populate the pond with flora and fauna – and, as I had hoped, never a day goes by without the girls going over and playing in or just admiring the pond! They love the fish, but the frogs are a big hit! They love the stream, too, and this year we are filling the adjacent rock garden with Stepables so they will have colorful and soft plants under foot. I am so happy with our watergarden! Nothing seems to invoke in a child a sense of wonder and awe and joy of nature like a pond. I hope you will find a way to add water to your property, not only for your own enjoyment, but for your children.
Then a few years ago we built an addition and we had a great big pile of clay to do something with! The time was right! I did lots of research over the winter and by summer I knew what needed to be done. My husband used the clay to increase the grade of our slightly sloping yard, and he and my son dug a hole. I laid the stone around the pond, and the girls and I arranged the stream and waterfall. That took us to autumn, but by spring of last year we were ready to populate the pond with flora and fauna – and, as I had hoped, never a day goes by without the girls going over and playing in or just admiring the pond! They love the fish, but the frogs are a big hit! They love the stream, too, and this year we are filling the adjacent rock garden with Stepables so they will have colorful and soft plants under foot. I am so happy with our watergarden! Nothing seems to invoke in a child a sense of wonder and awe and joy of nature like a pond. I hope you will find a way to add water to your property, not only for your own enjoyment, but for your children.


 RSS Feed

