Most plants in your bouquet will last several days decorating your table, but you can extend the life of your edibles by keeping them in the refrigerator.
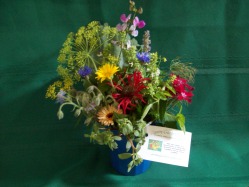
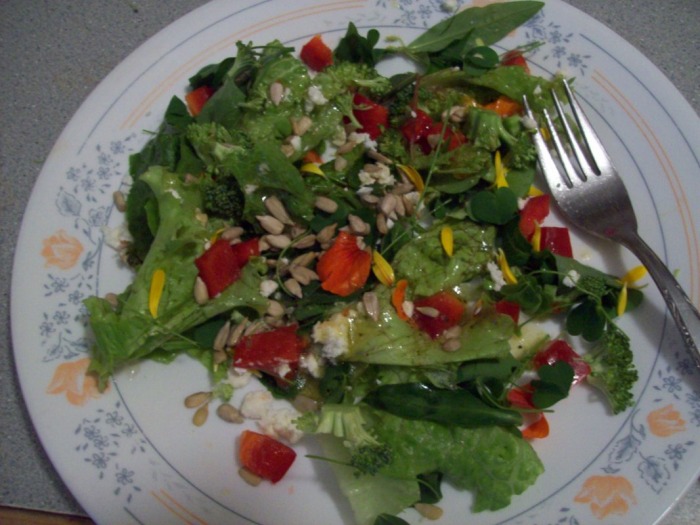
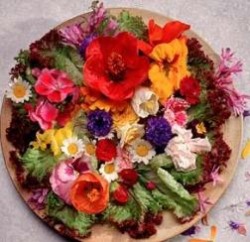
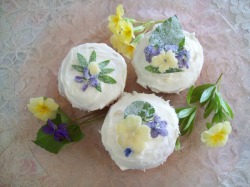
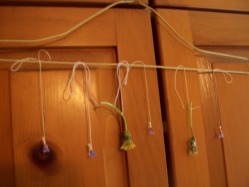
I use many different flowers and greens in my bouquets. For those who have purchased one, or have been given one as a gift, here are some instructions for the edibles you may have in your arrangement: Most plants in your bouquet will last several days decorating your table, but you can extend the life of your edibles by keeping them in the refrigerator. 
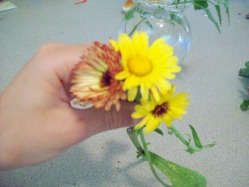
Calendula: There are many different kinds of calendula. They have great medicinal value, but can also be used as color in salads and soups – sprinkled on anything, really! Pull off the petals, or place whole on a plate as a garnish. Calendula do not last long in a vase, so use them the day you get them, or refrigerate. 
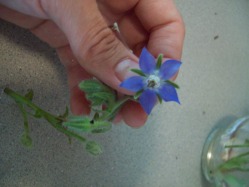
Borage: Both the very small leaves and the flowers of borage can be eaten, but chop the leaves. The flowers taste like cucumber! They can be carefully removed from the green portion by holding the stem with one hand and grasping the black part of the flower with the other, then gently pulling. 
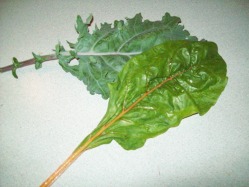
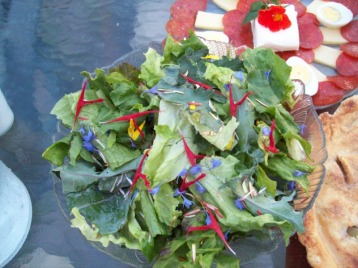
Kale at top, Chard below Swiss Chard and Kale: These greens can be torn and tossed into any salad. In larger quantities, they can be cooked as green vegetables. Be sure to remove the thick part of the stem, though. Kale holds up very well, but swiss chard will wilt quickly in a bouquet, so use the day you get it, or wrap and refrigerate. 
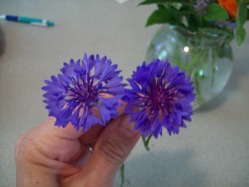
Bachelor buttons: Pull off the petals of this lovely flower and strew on your vegetable or fruit salads for a lovely color. They will last several days in a vase. 
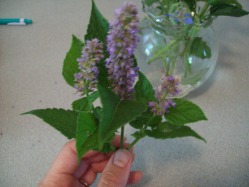
Anise Hyssop: Both the leaves and flowers of this healthful and medicinal herb have a wonderful anise flavor! They are especially nice with a fruit salad, or in baking, but can also be used as tea, or added to another beverage for flavoring. 
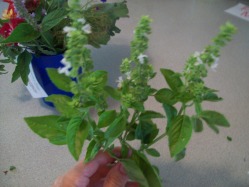
Basil: No explanation needed on using basil! Both flowers and leaves of basil can be used to flavor many dishes. 
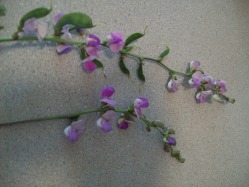
Hyacinth Bean: Toss the flowers and the very small beans in your salad for nice purple color. Although some suggest this bean is not edible, it is a staple in Asian cooking. 
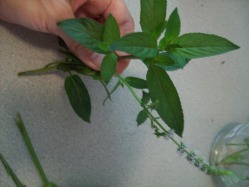
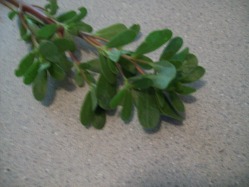
Mint: The mint in my bouquets is black mint, a very, very minty flavor! It’s like biting into a mint tic tac. It is wonderful in beverages, and as a garnish for fruit salads, or any other place mint is called for. Mint may not last long in a bouquet, so refrigerate. 
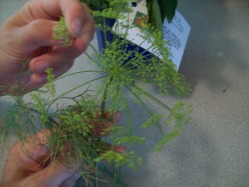
Dill: Both the feathery leaves and the flowery umbels of dill are edible. Just snip the little flower clusters and toss them in your salad, soups, or wherever you want both dill flavor and color! Nasturtium: Nasturtium flowers have a very peppery flavor and can be separated and sprinkled on salads or used as flavoring in soups and various dishes. The small leaves can be used in the same manner, but the larger ones are too peppery for most palettes! 
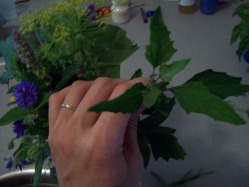
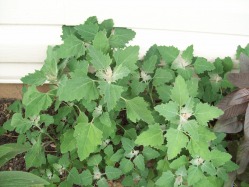
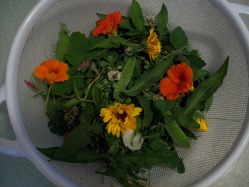
Lamb’s Quarters: Well! This is one of the finest greens we have! Be sure to take a colander out when you weed, and bring this lovely plant in for dinner. Use the leaves in salads, but both leaves and younger stems can be chopped and added to soups, or cooked as greens. See my lamb’s quarters blog entry for more information on this wonderful plant. 
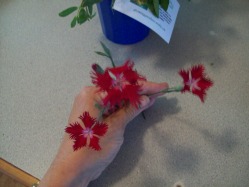
Dianthus: These dianthus have a fun, spicy flavor and are very lovely! There is a white tip at the bottom of the petals when they are removed from the flower. This can be bitter, so snip it off to improve the flavor. 
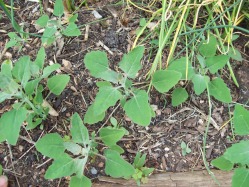
Purslane: Here is another plant that we now call a weed, but which was a highly prized vegetable for thousands of years. I will write a post on it soon, but suffice to say that it is chock full of vitamins and omega-3 fatty acids. With a slightly lemony, tangy flavor, it's terrific chopped up in your salad, and can be used as a thickening agent in soups, because of its mucilaginous quality. 
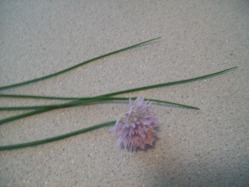
Chive: Like Basil, hardly any explanation is needed for chive. With its mild oniony flavor it is excellent in many dishes. Chop the leaves and pull the flowers off the head, then sprinkle on salads or on your dinner as a tasty garnish, or mix in butter for a flavored spread. Yum! 
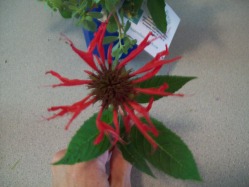
Monarda: A member of the mint family, Monarda (Beebalm) has a unique flavor which is wonderful in rice and meat dishes. Pull off the red bracts and sprinkle on your salad for fabulous color and flavor. 
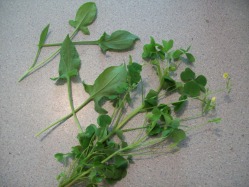
Sorrel: Wood sorrel looks like clover with tiny yellow flowers, garden sorrel or red sorrel looks like a spade. Both taste very strongly of lemon! Pick off the leaves and strew in your salad for a nice zip. Another wonderful 'weed' that so many people consider a nuisance, but is so yummy and so good for you! Be sure to check my blog for other ideas about using edible flowers and wild plants!
0 Comments
OK, as I promised, here’s the secret ingredient for the mock apple pie – zucchini! Anyone surprised? The children all raved, because it REALLY tasted like apple pie. One of the girls shared that it reminded her of "Ma" in one of the Little House on the Prairie books, The Long Winter. In the story, all the girls and Ma were full of excitement and giggling, because they had a surprise for Pa – a very special dessert. When they brought it out and he tasted it, he was amazed! "Apple Pie! Where in the world did you get apples?" The girls could contain themselves no more. "It’s green pumpkin!" the youngest shouted. Pa was convinced Ma was the best cook in the world. I took it as a high complement that I reminded them of Ma, especially since they don’t always like my concoctions, and because my son refused to even try it when he found out it had zucchini in it. (I told him if he didn’t want to eat what I was serving, he could choose to eat nothing. So he did. At 17, if he wants to be stubborn, he can make that choice. The girls all told him afterwards it was absolutely delicious and tasted just like apple pie. So there.) So here’s the recipe. (Yes, I try to limit white sugar in the house, but hey, it has 8 cups of zucchini! That has to be good for them!) Try it, then comment! I’m feeling lonely without comments. Zucchini "Apple" Pie 1 ¼ c. sugar 1 ½ Tbs flour 1 ½ tsp cream of tartar 1 ½ tsp cinnamon 1 Tbs lemon juice 8 cups zucchini, peeled, seeded, and sliced (I sliced them to look like apple slices) Cook the zucchini in 2-3 cups of water until they turn opaque, 10-15 min. This is the most important step. My slices were no more than ¼ inch thick, and I cooked them until they cut easily with a fork and had no white look left to them. You don’t want them mushy, since they are going to cook more in the pie, but if you don’t cook them enough now, they will not fool anyone in the pie. It’ll still taste good, but not like apple. Once cooked, pour into a colander, drain, and cool. Put into a bowl and add the rest of the ingredients, mix well and pour into an unbaked pie crust. Dot with butter and add the top crust. (I always cut vents in the top crust, and cut little crosses to bless the food. My paternal grandmother always blessed her bread dough as a prayer that it would rise and as a prayer for those it would feed. So nice. I also brush the top with milk and sprinkle with cinnamon/sugar.) Put tinfoil just around the edges of the pie crust, bake at 425 for 15 minutes. Then remove the tinfoil, lower the temperature to 350, and cook another 35 minutes. Your pie will be a masterpiece! (Some time I’ll give you my pie crust recipe, but this post is long enough!) A very easy and lovely way to use edible flowers is in ice. Look at this beautiful beverage! Here's how to do it:
4. Remove ice trays and finish filling them with water. This keeps the flowers in the center of the ice.
5. Freeze. 6. When it’s time to use them, take the ice trays out of the freezer and let them sit for a minute or two so the ice loosens from the trays a bit. This minimizes breakage of the ice cubes. 7. Float the ice cubes in your beverage and enjoy! I found that after a while as the ice cubes melted, little bits of flowers floated in my beverage. I didn’t care, since they’re edible, but keep that in mind. If you just put one small flower in each ice cube, your guests will probably finish their beverage before the ice melts. We put lots of little blossoms in each cube. It certainly was pretty! This should be one of the first wild foods that you should get to know and use, after dandelion, of course. But this plant is even more useful for food than dandelion, because it NEVER gets bitter and can be eaten from spring until frost – even in the winter, if you dry it. Seedlings The origin of this plant’s common name is shrouded in antiquity, but the best guess is that the shape of its leaf reminded people of a cut of meat. Its botanical name, chenopodium album, is easy to explain; it translates as "white goosefoot." Indeed, the leaf also looks like a goose’s foot, so it is sometimes called Goosefoot, and the undersides of the leaves are white with a powder (it’s supposed to be there – some kind of protective layer.) It is also called Pigweed – because pigs eat it. Pigs are smart. Lamb’s quarters is extremely nutritious, in some nutrients moreso than its relatives, spinach and beets. The leaves are a superior source of beta carotene, calcium, potassium, and iron. It also contains trace minerals, B vitamins, vitamin C, and fiber. The seeds, available in the fall, contain protein, calcium, phosphorus, potassium, and niacin. "Wildman" Steve Brill reports in his great book, Identifying and Harvesting Edible and Medicinal Plants, that Napoleon used the seeds to make bread for his army when grain was scarce. I even found this really cool website that lists the daily value of the nutrients in lamb’s quarters. It probably does other weeds as well, so I’m going to look at it more. Apparently, if a food has 20% or more of the daily value of some nutrient, it is considered high in that nutrient. Get this, lamb’s quarters has 281%DV of vitamin A, 111% vitamin C, and 1112% vitamin K! Honest! Check it out yourself! Now do you believe me? Get a good field guide, like the one I just mentioned, or Weeds of the Northeast, before eating anything you are not familiar with, but do start using this wonderful plant. It has a very mild flavor, hardly noticeable, really. It’s delicious both raw or cooked. You can use both the tender young shoots and the leaves, especially the smaller, younger ones. I put it in my salads and add it to my soups. You can chop it, stems and leaves (preferably not the older, tougher stems, but they are still edible) and cook as you would spinach. However, it does lose about 2/3 of its volume, so collect a lot, or mix it with something else. Once I made a side dish of a bag of frozen spinach and Lamb’s Quarters. Somehow the kids noticed a difference, but ate it anyway, without complaint. It was still quite pleasant. When collecting, check closely for aphids or tiny eggs on the undersides of leaves. I can only surmise that this plant is so darn good for you that even insects prefer it. Use only leaves with no chew marks or little red lines that look like a miner bug has been in it. Older plants are more likely to have these issues, but there are plenty healthy plants around! I now include Lamb’s Quarters in my Edible Bouquets, in an effort to introduce this delicious and nutritious wild plant to more palettes. From now on, if you see it while weeding, don’t throw it out; run it right into the kitchen! Here’s a lovely, fun summer dinner! Neatly sprinkled with edible flowers, this colorful meal really satisfies The fruit and veggie platter is garnished with borage, monarda, mint flowers and sprigs, and nasturtium. Also from our garden: blueberries, a smattering of red and black raspberries, beans, and broccoli. The cheese, pepperoni, and egg platter is garnished with mint and nasturtium. The salad includes three kinds of lettuce, kale, lamb’s quarters, wood sorrel, bachelor buttons, monarda, two kinds of calendula, and white and red clover. Adding various vegetables, seeds, cheese, and salad dressing make a delicious and nutritious salad. This dinner was an opportunity to try different flavors. My girls discovered that mint tastes great with cantaloupe, and lemon tastes yummy with banana. And I discovered that raspberry tastes great in a salad with Italian dressing! The "apple" pie was actually the main course! Not made with apples, but with a secret ingredient from the vegetable garden, you’ll have to wait until I post the recipe to find out! I promise I’ll do it soon! This is what Christina thinks of this meal. Bon appetit! In a recent weeding fest, I took my colander out with me and collected these lovely greens for dinner. Many garden volunteers are packed with way more vitamins, trace minerals, and iron than what we are offered at the food store. This is a very easy way to get good nutrition into your family. Ingredients in this salad:
Wood Sorrel Lady’s Thumb Pa. Smartweed Immature pea pods Lamb’s Quarters Purslane Red Sorrel Pea flowers Clover flowers Nasturtium flowers Calendula flowers All over a bed of mixed lettuce from our garden: Buttercrunch Red Fire Simpson Elite Red Sails Adding broccoli, carrots, red peppers, cauliflower, raw sunflower seeds, feta, raisins, and italian dressing, we have a delicious and truly nutritious salad! Twenty-three ingredients do not quite equal the 35 ingredients used in the salads of the Middle Ages and Renaissance, but it’s a start. (Little by little, I will post about these wonderful weeds and how nutritious they are.) Challenge: Go weed your garden and see what plants you already know are edible that you could put in tonight’s salad – even if it’s only one new food. Then post a comment! I think there’s never been a time before this century when flowers were not used extensively in cooking. Yet the 20th century lost this fine art, and we have yet to regain it. Cook books, herbals, and folk lore from the Medieval period through the 19th century give us an amazing picture of the varied diets of the people, and suggest much more refined palettes than perhaps we have today. Imagine a salad with a minimum of 35 different ingredients! Yet that’s what the head gardener to King James II of England recorded. Such a salad would include candied or pickled roots such as daisy, fennel, angelica and parsnip, leaves from primrose and violet, greens of purslane, arugula, plantain, and hyssop, as well as their flowers, candied or pickled. Even vine tendrils were used! Salad dressing included oil, vinegar, mustard and egg yolk. And we think the Caesar salad is creative! I will be posting recipes using flowers, many of which we will try ourselves. I’m really kind of excited about it! We’ll have to start gently, easing the children (and my husband!) into it with candied flowers and flower icecubes. I think I’ll strew flowers in salads, then try herbed butters next, then some floral butters. Once the family’s taste buds can handle eating nasturtium and rose petals and lavender, then we can get adventuresome! I hope you will join me on this exciting journey! Wow! This is so yummy! I found the world’s easiest recipe for making your own yogurt, in Ready Made magazine (April/May 2010), while I was sitting in the dentist’s office last week. Since I am always running in a thousand directions, easy and quick are essential qualities in a recipe, but I was skeptical when I saw this. Could it really be that simple? Well, it is! And so good for you! Here goes: Ingredients: 1 qt 2% milk 2 Tablespoons plain yogurt (make sure it has live cultures) Tools pot instant read thermometer (like for making candy) whisk 1. Heat the milk on the stove until frothy and steamy (but NOT boiling) to about 180 degrees on the instant-read thermometer. (Mine went to 190. Be sure not to touch it to the pot, or it will give a false reading.) 2. Take the pot off the heat and let it sit until the temperature is 115 degrees. Check frequently as it gets closer (it took about 20 minutes for mine). Briskly whisk in the yogurt. 3. Pour into a quart jar with a lid (canning jar works great) and wrap in a couple towels to retain the heat. Put the jar in an out-of-the-way spot to sit for at least 5 hours, or overnight. 4. The next day it will be solid! Unwrap and put in the fridge. It should last about a week. 5. Save 2 Tablespoons to make your next batch! I happen to like the taste of plain yogurt, and this was as good as anything from the store. But then I added our home-made Strawberry Freezer Jam – heaven! Also good with other jams and jellies. Next I’ll try it with our fresh blueberries! This is a recipe I have already used again and again. Let me know how you like it! Candied Flowers add such a lovely touch to any cake or other special treat! And they’re not hard to make. First, choose some edible flowers. You can work with them whole, like Primrose or Johnny Jump-ups, or remove petals of larger flowers, like roses or nasturtium. Wash the flowers a while before using so they’re totally dry. Next, beat an egg white slightly in a small bowl. Holding the flower by its stem and using a very small paint brush, coat the flower both front and back with the egg white. Sprinkle the flower with superfine sugar, both top and bottom, for a glittery look. Dry on a rack (move them around after a couple hours so they don’t stick. We did tiny flowers, so we put ours on a plate instead of a rack, and they turned out fine.) Leave in a dry place or dehydrator for a couple days, then store in a tin. Some varieties will last for months if stored dry and sealed. If they become distorted or broken, use as confetti on the cake! An alternative method is to make a paste of confectioners’ sugar and egg white and brush it on the flower, top and bottom. This gives a muted, old-fashioned look. These are strawberry blossoms. The one on the left was done with powdered sugar paste. It is more defined, I think, than the one with granulated sugar, and the green parts underneath show through. I liked that, but we only did a couple of those. We also candied some lungwort flowers, which are like little tubes, so we hung them to dry (we tried dandelions, too, but they were a flop.) Below are some additional pictures. The cake is decorated with strawberry blossoms, violets, lungwort flowers, primrose, and sweet woodruff leaves. So you see? You can have your cake and eat your candied flowers, too!
So, always wanted to make jam, but were intimidated by the processing and the mess? Well, you need not be intimidated any more! Just grab yourself a packet of Ball Original Fruit Pectin (formerly known as Sure-Jell), and make yourself some freezer jam! Here are the steps, but the instructions are right in the packet. There are also instructions for berry, cherry, peach, strawberry-banana, and strawberry-kiwi. We actually added a few mulberries to our strawberry batch, giving us wonderful purple dots in the pink!
|
AuthorWelcome to Growing Goodness! This website is dedicated to growing good things, both plants and children. It's a gardening blog with maternal overtones, as I discuss the goodness and value of plants, both wild and domestic. In the process I hope to help you pass a love of nature on to your children. Happy Gardening! Archives
August 2011
Categories
All
|